Monday, March 27, 2017

Easter Bunny & Chicks

Hello Blogger Friends! Thanks for taking the time to stop and visit with the Charmed Life Blog.
Can you believe it's already the last week in March? Easter will be here in just about 3 weeks. Have you started making your Easter or Spring cards yet?
 
I have made a few but still need a few more. So today I am featuring an Easter card that would be quite easy to put together quickly. By changing the colors and background designer paper it could give it a different look.
 
Check out this post for another that I made. I added clouds and grass and used other designer paper.
 
So here are some details on how I created this card:
Chocolate Chip Card Base: 5 5/8" x 4 3/8" (used hinge technique to get this size- see instructions for this technique here:
Peekaboo Peach layer: 4 1/4" x 5 1/2"
designer paper layer: 4 1/8" x 5 3/8"
white image panel: 2 7/8" x 3 1/2"
I used the colors from the Color Challenge #626 on Splitcoaststampers. Pam was our hostess and she chose so saffron, cucumber crush and peekaboo peach for her color trio. Optional was to use spring flowers.
so saffron cucumber crush peekaboo peach
I used an older MojoMonday #488 sketch. The layout allows the background paper to be seen nicely.

My designer paper is from the Stampin'-Up "fruit stand collection". And it has tulips on it so the option is covered.
The cute bunny and chicks are from CottageCutz. It's part of the new Spring release - the Easter Bunny & Chicks die. Cut him in peekaboo peach. And his bow in cucumber crush. The chicks are in so saffron with a peach wing. These dies are on sale right now. Check it out here.

My sentiment is from a Great Impressions stamp. I used my stamp-a-ma-jig to place it on 2 lines and also to stamp at an angle. To finish off the card I added some Stampin'-Up enamel dots in the cucumber crush color.
 
Well, that's it for me for this post. Until next time.........God bless.
 
Card details:
Stamps: Some Bunny Loves You (Great Impressions Stamps)  
Paper: chocolate chip, peekaboo peach, so saffron, cucumber crush, whisper white, fruit stand dsp (Stampin'-Up)  
Paper Size: A2
Ink: chocolate chip
Accessories: Easter Bunny & Chicks die (CottageCutz), enamel dots (Stampin'-Up), Flag Stax die (MFT)
 
Dies I used: 
http://www.scrappingcottage.com/cottagecutzeasterbunnyandchicks.aspx
 
I am also entering:
1.  Addicted to Stamps Challenge #144 is Easter.
2.  Come and Get It has a spring time challenge.
3.  My Time To Craft has a woodland animals or Easter challenge.
 

Saturday, March 25, 2017

Woodland Animals Masculine Card

Hello Blogger friends! Thanks for taking the time to stop and visit with the Charmed Life Blog. Another weekend is upon us and it is expected to be a warm one here in Pittsburgh.
 
I have been staying over my son's home to take care of their dog while they are away for a week. My youngest grandson is in Orlando for a baseball tournament and this year my son and daughter-in-law decided to go along.
 
Originally I thought I might bring Apollo here but then I wasn't sure how he would be when I had to go to preschool. It's a different house and his family is away. Lots of driving back and forth but I am glad to be able to help. Hubby has split his time between our house and their house. They come back Tuesday afternoon so not too many more days.
 
I drove back here yesterday to create my card for my weekly DT post on the CottageCutz blog. So let's get started on the details of my card.
 
There was a release of a really cute Woodland Animals stamp and die combo back in January. Maybe you missed it or maybe you were thinking you're not into woods or woodland themes. But, how about thinking out of the box with this stamp and matching die set.

I needed a masculine birthday card that would have a “from all of us” sentiment. So I decided to create a birthday card using these cute animals. Let's get started with some details on how I created my card.

Turquoise card base: 4 1/4" x 5 1/2"
Stampin'-Up designer paper layer: 3 5/8" x 4 5/8"
Crushed Curry Rectangle Frame: largest in set

Step 1: Stamped the deer, raccoon and fox in Memento Tuxedo Black ink on a 120# weight white cardstock. I colored them using Prismacolor pencils and Gamsol which is an odorless mineral spirits. Since these are wax based pencils the Gamsol helps to move the color around. The heavier weight paper seems to work better for me when I use these colored pencils.

Pencil colors I used:
Deer: 1094 Sandbar brown and 948 Sepia
Fox: 1032 Pumpkin Orange, 943 Burnt Ochre and 948 Sepia
Raccoon:  French Gray 70%, French Gray 90%, 928 Blush Pink and Black
 
Step 2:  Looked through my cardstock and patterned papers for my color scheme. I found this festive paper from the Stampin'-Up "cherry on top" collection. I thought it would work great as a background layer for my woodland animals. The paper determined my card base (turquoise), the wide rectangle layer (crushed curry), as well as the flag (cucumber crush) that I used for my sentiment.
 
Step 3:  I wanted my birthday sentiment stamped right on the patterned paper. So I pulled out my MISTI to get it placed where I wanted. To make the sentiment stand out against the patterned paper,  I embossed it using Versamark and Tuxedo Black ink plus clear embossing powder. I also stamped the "from all of us" sentiment on the cucumber flag panel. I didn't take a photo of this.
 
Step 4: Everything is prepped and ready for card assembly. I used dimensional adhesive on the pierced wide rectangle frame and on the animal images. I placed the animals on one of the scalloped banners on the patterned paper.
 
Well, that's my card for this post. So until next time........God bless.
Dies I used to create card:
http://www.scrappingcottage.com/cottagecutzwoodlandanimalsstampanddie.aspx

http://www.scrappingcottage.com/cottagecutzpiercedwiderectangleframesetbasics.aspx
 
I am also entering:
1.  Brown Sugar has an anything goes challenge.
2.  4 Crafty Chicks has a punches or dies challenge.
3.  Crafty Friends has a "B" is for........ challenge.
4.  My Time to Craft has a woodland animals challenge.


Monday, March 20, 2017

Easter Cross & Tulips 2

Hello Blogger Friends! Thanks for taking the time to stop and visit with the Charmed Life blog.
 
It's officially the first day of Spring. Our weather is still cold and we had snow over the weekend but we have no complaints. Our winter here in PA was very mild.
The tulips are up about 3" and the hyacinths about the same. Our crocus have already bloomed. Won't be too long before all our plants are back in bloom again.
 
Easter is fast approaching. Just a little over 3 1/2 weeks away. I have created several cards and an featuring another one today. This one I created for the color challenge #624 on Splitcoaststampers.
 
Roberta was our hostess and she chose daffodil delight, garden green and blackberry bliss for her color trio. Optional this week is  to add bling.

I am using last week's layout from the SC633 challenge. Ally was the hostess on that one. I made another card using this same layout but with different colors. See that one here.

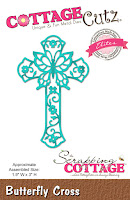
My designer paper on this card is from the Stampin'-Up "farmer's market" collection. I also used blackberry bliss ribbon as one of the sketch layers. All the dies are from CottageCutz. The Butterfly Cross is part of their new Spring 2017 collection.

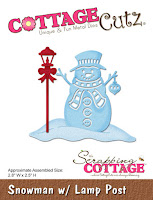
For my bling, I used pearls on the butterfly. The greenery under the tulips is the snow bank from the Snowman w/Lamp Post die set. I cut it then placed it in the circle die and cut it again to get the rounded edge. Just another way to get more mileage out of the dies you already own.

Well, that's my card for today. Until next time.........God bless.
card details:
Stamps: blessings (MFP)
Paper: daffodil delight, balckbery bliss, garden green, very vanilla, farmers market dsp (Stampin'-Up)
Paper Size: A2  
Ink: blackberry bliss
Accessories: butterfly cross, circle dies, hello spring, snowman w/lamp post, and valentines border dies (CottageCutz), yellow pearls (Darice), blackberry bliss ribbon (Stampin'-Up) 
 
Dies I used  
http://www.scrappingcottage.com/cottagecutzbutterflycrosselites.aspx

http://www.scrappingcottage.com/cottagecutzsweetloveborders.aspx

http://www.scrappingcottage.com/search.aspx?find=snowman+w%2flamp+post

http://www.scrappingcottage.com/cottagecutzfancypocketplus.aspx
 

Saturday, March 18, 2017

Easter Bunny Sketch

Hello Blogger Friends! Thanks for taking the time to stop and visit with the Charmed Life Blog.
Another weekend is upon us and in our house March Madness is at a frenzy. Well maybe not a frenzy but that's all that has been on the TV since Thursday (lol).
But, my hubby is a big college basketball fan. Not that I mind though because I was in my craft room all day yesterday and I hope to get in there again today.
 
My card for today is one that I made for my weekly DT post on the CottageCutz Blog. I used the MojoMonday sketch for the layout and Stampin'-Up cardstock and designer paper.
 
Today for your viewing pleasure, I am featuring the Easter Bunny & Chicks die. This die has two cute bunnies and 2 chicks.

This week I decided to make an Easter or spring card. So I selected my die and some bright patterned paper and cardstock. The whimsical pattern on the designer paper will fit well with the Easter bunny. I also thought this sketch would keep my layout more simple and still allow the patterned paper to be seen.  Let's get started with some details on how I created this card.

calypso coral card base: 4 1/4" x 5 1/2"
gold soiree designer paper layer: 4 1/8" x 5 3/8"
white image panel: 2 7/8" x 3 1/2"
garden green layering panel: 3" x 3 5/8"
http://mojomonday.blogspot.com/2017/03/mojo-monday-488.html
The bunny is cut in a cantaloupe shade of cardstock and his little bow in a medium green. The chick in a bright yellow and I shaded his wing with the same color of ink to give a bit of dimension.  Did some shading with cantaloupe ink around the bunny to add depth.
 
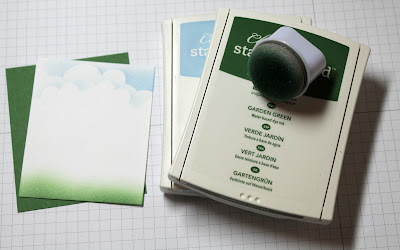
For the image panel, I sponged the bottom with a medium green ink for grass and also to ground the bunny image. I used a cloud template and added a few clouds with a light blue ink.
 
I wanted the sentiment in the corner of the card and the "some" word to be placed on an angle. I pulled out my stamp positioner to accomplish this. I taped off the 2nd line of the sentiment and stamped my first line. Then I taped off the "some" word and stamped my 2nd line.
 
 
All the preliminary work is done and I am ready for card assembly. For the long rectangle panel on the sketch I decided to use a flag. And, I added garden green enamel dots that matched the garden green cardstock to complete the card.
 
I hope I have given you some inspiration to create either an Easter card or a Spring card to send to someone special. That's it for me for this post. Until next time......God bless!
 
Dies I used to create card:
http://www.scrappingcottage.com/cottagecutzeasterbunnyandchicks.aspx


Wednesday, March 15, 2017

Celebrate St Patrick's Day

Hello Blogger Friends! Thanks for taking the time to stop and visit with the charmed Life.
Well the big snow that was predicted for the Pittsburgh area turned out to be nothing. We had about an 1" or less accumulation. Not that I would have minded having a lot more.
As I type this we are having some snow showers but it doesn't look threatening. We haven't had much snow at all this season. And now next week Spring starts.
It was very cold and blustery yesterday.
 
We had a family dinner at a restaurant that was on the river. Wow the wind was really blowing as we exited the garage to walk to the place. One of those cold to the bone winds! But the dinner was great.
 
My middle grandson was home on Spring break so both sets of grandparents, his parents and a couple others all had dinner with him. There were 12 altogether. Hubby and I had the privilege of him sitting by us. It was just a great family evening.
And he also wanted us to come over on Thursday night for dinner. This will be a little more intimate with just hubby and I and my son's family.
 
Now onto today's card. This one I made using the colors from the color challenge #625 on Splitcoaststampers. Barbara is our hostess and she chose emerald envy, gold and whisper white.  Optional this week is St Patrick's Day.

Well, I looked at the colors 2x before I started my card and somehow the emerald envy translated to cucumber crush. What is wrong with me??? As I was making my card, I was thinking that the green didn't look like an Irish green shade.

Of course it didn't, because it wasn't the color that Barbara picked. But, I didn't realize it until the card was finished and I was writing up my description for the card. So I  begged for a pass from my teamies (lol)!!!

Here are the details of my card. I noticed that over on the Verve site there was a free St Patrick's Day digi set - Feeling Lucky. So I downloaded it and used it for my card today. The sentiment inside the shaker is part of that set as are the shamrocks. I printed the shamrocks on the cucumber crush cardstock and fussy cut them.

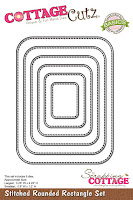
The frame for my shaker elements is cut from the CottageCutz stitched rounded rectangle and square dies in whisper white cardstock. To cover the gold color I added sequins inside the shaker.

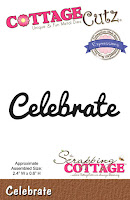
My background designer paper is from the Stampin'-Up collection "Cherry On Top". The celebrate word is a die from CottageCutz. And, that is my card for today.
So until next time......a happy St Patrick's day to all and God bless.
 
card details:
Stamps: Feeling Lucky (Verve Digi)  
Paper: cucumber crush, whisper white, cherry on top dsp (Stampin'-Up)  
Card Size: A2
Accessories: stitched rounded rectangle, square and celebrate dies (CottageCutz), gold sequins (Darice)
Techniques: shaker card
 
Dies Used:
http://www.scrappingcottage.com/cottagecutzstitchedroundedrectanglesetbasics.aspx
 
http://www.scrappingcottage.com/cottagecutzsquaresetbasics.aspx
 
http://www.scrappingcottage.com/cottagecutzexpressionscelebrate.aspx
 
I am also entering: 
1.  Crafting By Designs has a for a man challenge.
2.  Shopping Our Stash has a luck of the Irish challenge.
3.  Crafty Creations has an anything goes challenge.
 

Tuesday, March 7, 2017

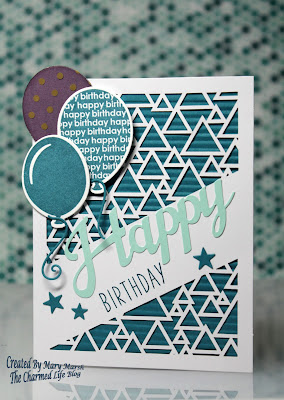
~ Party Balloons ~

Hello Blogger Friends. Thanks for taking the time to stop and visit with the Charmed Life Blog.
 
Today was Preschool day. We are celebrating Dr Seuss month in March. For 3 year olds that means we will do a craft based on one of the Dr Suess book's and read one of his books.
 
Today it was Red Fish Blue Fish and we did the cutest craft. They made fish with red and blue cupcake liners. I flattened them out for them ahead of time. For the tails I die cut some squares and then cut them on a diagonal. We used self stick googlie eyes. 
 
They like to work with glue sticks so attaching the fish bodies and tails was no problem. We just have to watch some of them because left unattended with a glue stick gets crazy. They will put it all over their paper.
 
Thursday, we will do another project centered around this same book. They will be painting with cotton balls and clothes pins. I found a cute picture online of 2 fish and its titled red fish blue fish. 
 
Now, let's move onto my card for today. This one I made for the color challenge #623 on Splitcoaststampers. Karen was our hostess and she chose perfect plum, island indigo and pool party for her color trio. Optional was a touch of gold somewhere on your card.  that was a little tough because I was going after a masculine card, but I made it work.
perfect plum, island indigo, pool party
My card base and some elements are from the 2016 Stampin'-Up Paper Pumpkin Kit "many manly occasions". This kit came with corrugated orange cardstock to use under the front panel. I liked that look so I used island indigo cardstock and ran it through my paper crimper.

The pool party "Happy" word die cut came in the kit. I stamped the birthday sentiment using the stamp set from this kit in island indigo ink.

My balloons are from the MFT stamp set "party balloons". It has a matching die to cut them out. I covered the perfect plum balloon with some fabulous foil acetate designer paper from Stampin'-Up. That covered the gold option for me.

Added a few stars on the sentiment panel and completed the card. This card was sent off to my grandson for his birthday. And, I can say he really liked the card. He is a big genuine supporter of my card making.
 
Well, time to dim the lights in Charmed Life land for another day. So until next time......God bless.
 
card details:
Stamps: many manly occasions (SU Paper Pumpkin Kit 2016), party balloons (MFT)               Paper: island indigo, perfect plum, fabulous foil acetate dsp                                                         Paper Size: A2                                                                                                                                    Ink: Island Indigo Perfect                                                                                                         Accessories: many manly occasions Paper Pumpkin Kit 2016, Starry die (Verve), Party Balloons die (MFT), paper crimper
 
I am also entering:
1.  Crafting From the Heart has an anything goes challenge.
2The Paper Players has a theme challenge- cut it out.
3Challenge Up Your Life has a letters challenge.
4Just Us Girls word week geometric challenge.


Saturday, March 4, 2017

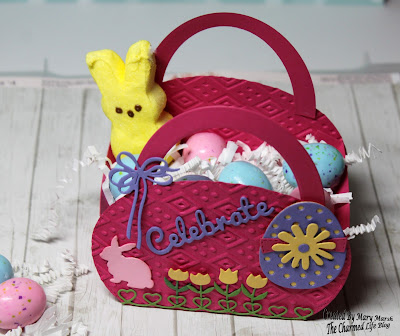
Easter Basket + Tutorial

Hello Blogger Friends! Thanks for taking the time to stop and visit with the Charmed Life Blog.
 
This morning our Preschool attended an early education event at a local high school this morning. It was put on by the local teachers and they invited area pre-schools, day-care centers, the local library and some government sponsored organizations.
We had lots of interest in our preschool. We are getting quite a good reputation in our community. Our classes are already filled for next year.
 
But, let's move on to my post for today. Cause it's a long one with a tutorial and lots of pictures. I made this cute Easter Basket for my weekly DT on the CottageCutz Blog.
 
I have seen quite a few baskets made using the Envelope Punch Board and I may try one of those soon. But, I realize that not all of you may have that tool. So my basket is made with dies and a scoring tool. I have loads of pictures for the process but here is a link to a video.

So let's get started on what I did for my project.

Step 1: The basket uses one sheet of 8 1/2" x 11" cut as shown in the following template.
 
My first cut was at 4 1/2" x 11". Then cut this piece in half to measure 5 1/2" x 4 1/2". Used these pieces for my basket sides. The next piece used for the basket itself was cut at 4" x 6 1/2".  My last cut was 4" x 4 1/2". I used this piece to cut the basket handle.
 
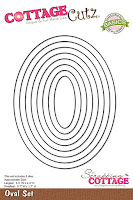
Step 2: I used the largest Stitched Oval die for my basket sides. I cut 2 ovals using the 4 1/2" x 5 1.2" cardstock piece.  For the handle, I used the Oval die set -  Choosing the 1st and 3rd largest dies in the set. The cardstock piece is the 4" x 4 1/2" panel.


Step 3: I was now ready to complete the scoring on the 4 x 6 1/2" panel.  First score was at 1/2" on both sides of panel in portrait mode. The 2nd score is at 2". This was done on both sides of cardstock. Used a bone folder to crease all score lines. Also make cuts as shown in photo.


Scor-Tape added to top and bottom of panel
Step 4: I also scored the stitched ovals. This just made it easier to fold it under the basket base. Scored this at 1/2".  Used an embossing folder for added texture on the basket sides. I didn't emboss the 1/2" that was scored.


Scor-Tape added to oval panels
 Step 5: Basket Assembly begins. The basket sides get secured to the base.


Step 6: Die cut the elements for decorating the basket. Used lots of bright spring colors. Elements adhered with Ranger Multi-Matte medium and glue dots. Added the handles to basket with glue dots. I simply cut the oval that I made in  Step 2 in half.


Step 7:  Basket completed and time to fill with some goodies for gift giving.
 
 
That's it for me for this post. I hope I have inspired you to make a basket of your own for Easter or as a Spring gift. Until next time.........God bless.
 
 
Dies I used to make basket:
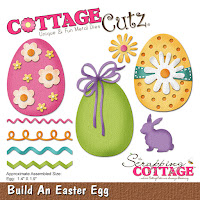
http://www.scrappingcottage.com/cottagecutzbuildaneasteregg.aspx

http://www.scrappingcottage.com/cottagecutzspringbunnies.aspx

http://www.scrappingcottage.com/cottagecutzovalsetbasics.aspx

http://www.scrappingcottage.com/cottagecutzsweetloveborders.aspx
http://www.scrappingcottage.com/cottagecutzovalsetbasics.aspx
 
I am also entering:
1.  HIMCR #291 has a spring colors challenge.
2.  Scrap & Craft has a celebrations challenge. My project celebrates Easter.
3.  Animal Friends Challenge has an animal with big ears challenge. I have a rabbit.
4.  Crafts and Me has a springtime challenge.

LinkWithin

Related Posts with Thumbnails