Monday, November 28, 2016

~Star of Wonder~

Hello Blogger Friends! Thanks for taking the time to stop and visit once again with the Charmed Life Blog. It's Cyber Monday and the sales are raging everywhere online. I bought a few things and saved big on what I did buy.
 
This year I am determined to wrap the gifts a little each day. I don't want it to be like every other year where I am scurrying at the last minute to get everything done. I have a lot of my cards made and this year I ordered 2 of the Paper Pumpkin kits from Stampin'-Up so I will get 16 cards made quickly by using those kits. Hopefully they will be done in the next couple of days and then I can start addressing them for mailing.
 
This is one of the cards I made for Christmas. I used the colors from Color Challenge #608. Maura was the hostess and she chose elegant eggplant, pacific point and soft sky for her color trio. Optional was to use silver.
 
 For my card I used the new Stampin’-Up Christmas set “star of light”. It also has the matching dies. I really like this card and hope to get a few more made using this set.

I stamped the background star cluster in pacific point ink. I also stamped the sentiment from this same set with the pacific point ink.

I die cut the largest star in the set in elegant eggplant and added a silver topper. Cut some smaller stars in pacific point and then scattered some soft sky sequins to complete this card. 
 
Well that's it for me for this post. So until next time......God bless.
 
card details:
Stamps: star of light (Stampin’-Up)
Paper: elegant eggplant, pacific point, whisper white, silver
Paper Size: 4 3/8" x 5 5/8" 
Ink: pacific point  
Accessories: starlight framelits, sequins
 
I am also entering:
1.  613 Avenue Create has an anything goes challenge.
2.  Weekly Christmas Card Challenge has an anything goes.
3.  Fashionable Stamping has a 'tis the season' challenge - autumn or winter.
 

Saturday, November 26, 2016

Christmas Bells and Holly

Hello Blogger Friends! Thanks for taking the time to stop and visit with the Charmed Life Blog this last Saturday in November.
 
Well our Thanksgiving Day celebration has come and gone for another year. We had a wonderful time with 4 generations sitting around our table having our Thanksgiving dinner. I spent days preparing for it and compliments were abounding. I love preparing a special meal for my family.
 
Now it's time to think seriously about Christmas.  So if you haven't started your cards as yet, I am showing one today that could very easily be mass produced. You could change it up by simply using a different designer paper.
 
So let's get started on some details of how I created my card. The bells are part of the Christmas Holly Bells die and the corner holly is from the Holly & Berries die.
 
Looks like both these dies are on a 50% off sale. In fact there is a Black Friday blowout sale going on as well as a new Black Friday "camping" release. So it's a good day to shop with this being small business Saturday. Plus you can get some great deals on Christmas dies. Check out the CottageCutz Pinterest Board for lots of inspiration from the design team.
 
Real Red Card Base: 4 1/4" x 5 1/2"
Soft Suede Layering Panel: 4" x 5 5/16"
Deck The Halls Designer Paper Layer: 3 7/8" x 5 1/8"
I started my card by choosing my designer paper. It's from the Stampin'-Up "deck the halls" collection. That determined my card colors and the shades of red and green I would use for my holly die cuts. I used real red from Stampin'-Up and a ivy green cardstock from Bazzill. I cut the holly leaves 2x because I like a bit of dimension with my dies.

Cut all the dies and now I am ready for assembling. The bells are cut from a metallic gold on kraft cardstock. I thought this shade of gold went well with the soft suede color on the designer paper. I tried a lighter shade of gold but didn't like it as well.

Decided on my sentiment and stamped that in a real red ink on crumb cake cardstock.  I cut it out with the stitched rounded rectangle die.  It makes it stand out a bit and adds interest to the card. The patterned paper was a bit busy to stamp directly on there.
 
To complete my card I added a few drops of glossy accents to the holly berries. I hope this card has given you some inspiration. If you want to recreate it for your Christmas cards, the dies are on sale including the stitched rectangle die.
 
Well, that's it for me for this post so until next time.........God bless.
 
http://www.scrappingcottage.com/cottagecutzchristmashollybells.aspx
http://www.scrappingcottage.com/cottagecutzhollyandberries.aspx
 
I am also entering:
1.  AllSorts has an anything Christmas challenge.
2My Sheri Crafts has a winter/Christmas challenge.
3.  Brown Sugar Blog has an anything goes challenge.
4.  Creative Knockouts has a Tis the Season challenge.
5.  Moving Along with the Times has an anything goes with Christmas.
6.  Time Out Challenge has a Christmas theme w/optional of glitter or shimmer. I used metallic gold cardstock and glossy accents.


Saturday, November 19, 2016

Mistletoe Christmas

Hello Blogger friends! Thanks for taking the time to visit with the Charmed Life Blog.
 
Well, our love affair with the warm weather is coming to an end this weekend. We are expecting falling temperatures and snow. Since it's been so warm the snow won't stick to the roads. Maybe cause some icy patches but I am not going out anyway.
 
The trees in our neighborhood still have lots of leaves on them. But after the high winds today they will be blown off the trees. We have raked the leaves in our yard 2x but still have lots more on our giant oak trees. Evan as I am typing this I can hear the wind kicking up. A good day to stay put and do some card making.
 
Speaking of card making that is the reason you stopped by my blog. So let's get started with the details on what I am showing today.
 
This one I created for both the color challenge #609 on Splitcoaststampers and my weekly DT post on the CottageCutz blog. I was the hostess on SCS and for my color trio, I chose garden green, basic black and your favorite red. I used cherry cobbler for my red and the Stampin'-Up "This Christmas" designer paper had all my colors.
 
My mistletoe is from the CottageCutz Holiday Greenery die. It was part of the Christmas 2 release.

garden green card base: 4 1/4" x 5 1/2" (A2 size)
cherry cobbler layer: 4 1/8" x 5 3/8"
designer paper Layer: 3 7/8" x 5 1/8"
image panel: 2 1/2" x 2 1/2"
black layering panel: 2 3/4" x 2 3/4"

Step 1: I started my card this week by choosing my designer paper. Once I did that, I just matched my cardstock to the colors used on the designer paper. Stampin'-Up makes that so easy with cardstock, inks, ribbon and designer papers that match.
 
Step 2: Cut my first 3 layers of cardstock to the above sizes and assembled using double sided tape. I decided to add some red seam binding just for added card interest. No bow because I want to keep the card flat for mailing.
 
Step 3: I cut my image panel using the basic square in vanilla and the stitched square in black. There is black in this patterned paper so I used that cardstock to help accent my card. I stamped my sentiment and added some dots cut from the holiday greenery die. I used dimensional tape on this panel to lift it away from the patterned panel.

That completes my card for this post. As I said, this one could be mass produced easily. And, that would free you up to do other Christmas tasks. Here is another look at the completed card.
 
Well, Blogger friends hope you have a great weekend and find some time to do a little crafting. Until next time.........God bless.
http://www.scrappingcottage.com/cottagecutzholidaygreenery.aspx

http://www.scrappingcottage.com/cottagecutzstitchedsquaresetbasics.aspx
http://www.scrappingcottage.com/search.aspx?find=square+set
 
 I am also entering:
1.  52 Christmas Card Throwdown has an old fashioned Christmas theme. I think my paper and mistletoe have a vintage appeal to it.  
2.  Crafty Catz has an anything goes with twist of using red.
3.  Just Add Ink has a choose two challenge-mine are die cut and designer paper.

Tuesday, November 15, 2016

Thanksgiving Happiness

Hello Blogger Friends! Thanks for taking the time to stop and visit with the Charmed Life Blog.
We are having such a warm Autumn season this year. And this weekend it's supposed to be 70°. I am in no way complaining. But living in Pittsburgh I know that this won't last. Snow will be here before I know it.
 
With next week being thanksgiving, it's time for me to get my Thanksgivng cards mailed. I have had them done for awhile. But somehow I was thinking Thanksgiving was a couple of weeks away - whoops!!
 
This is another that I created. So here are some details on this card.
 
This one I made for the color challenge #607 on Splitcoaststampers. Pam made her debut as a color challenge hostess and she chose daffodil delight, old olive and early espresso. Option is a fall flower. I chose a sunflower for my flower.
daffodil delight, early espresso, old olive
 The card layout is this week's MojoMonday472 sketch. It is a 4 ¾" square card. The sketch this week is all about circles.

My background designer paper is from the Stampin'-Up "watercolor wonder" collection. The large olive circle was cut with the CottageCutz double stitched circle set with designer paper from the Stampin'-Up "pretty petals" collection.

The sentiment circle is also cut with the CottageCutz double stitched circle set and the sentiment is from Dare 2B Artzy "many thanks" set. I used my sunflower for the 3rd circle. It is a sunflower die from Cherry Lynn Designs cut in daffodil delight and early espresso for the center. I added a couple of leaves and used the leaves and stems die from CottageCutz.

My flag is cut in early espresso and I added a few daffodil delight enamel dots for an accent. That finished my card.
 
Well, that's it for me for this post. So until next time........God bless.
 
card details:
Stamps: many thanks (Dare 2B Artzy)  
Paper: very vanilla, daffodil delight, old olive, early espresso, watercolor wonder &pretty petals dsp (Stampin'-Up)
Ink: early espresso, daffodil delight
Accessories: double stitched circle and leaves and stems dies (CottageCutz), sunflower die (Cherry Lynn Designs), flag stax die (MFT), brights candy dots (Stampin'-Up) 
 
I am also entering: 
1.  Crafting When We Can has a circles challenge.
2Robyn's Fetish Challenge is anything Thanksgiving.
3.  My Sheri Crafts has a Thanksgiving challenge.


Sunday, November 13, 2016

Northern Lights Technique

Hello Blogger Friends! Thanks for taking the time to stop and visit with the Charmed Life Blog. We have had such a beautiful weekend and today is no exception.
 
The leaves are finally beginning to fall from our trees. Our front yard is loaded with them. We have Pin Oak trees and on this type half the leaves come down in the fall and then the other half fall in the spring.
 
My hubby is working this weekend so no time for him to get them raked and removed. I may go out for a bit today and lend a hand. It's actually therapeutic to rake leaves. Well, at least for me anyway (lol)!
 
Now onto my card for today. This one I created for my DT post on the CottageCutz Blog. I thought I would try my hand at the Northern Lights Technique. I liked how my card turned out and here are some details on how I created it.
 
Rich Razzleberry Card Base: 5 1/2" x 4 1/4"
Crushed Cucumber Green Layer: 5 1/4" x 4"
Image Panel: 5 1/8" x 3 7/8"

Step 1: Started by selecting the 5 colors I wanted to use for my background sponging. There is a lot of sponging with this technique and each time you try it the card will turn out just a bit different.
Step 2: I decided to start with the yellow ink first. I made a couple of paths of color using a stamping sponge. The yellow really added some brightness to this background.
 Step 3:  I laid down my 2nd ink color using the medium blue ink. Just kind of followed the path of the yellow ink.
Step 4:  Added my 3rd ink color with the rich razzleberry shade. This is really a vibrant ink color and the reason I chose it for my card. With each addition of ink I used a different sponge.
Step 5: On this step I added the medium green ink and again I used a clean stamping sponge. I layered it in all the remaining white areas of my card.
Step 6:  On this final inking step I added the navy blue ink. This is how it turns into a sky. Using my stamping sponge I went in between the 2 colors to break up the line and to kind of mute the colors. You can make your sky as dark as you want it.
 
If it gets too dark you can go back in and add some more of the other colors to brighten it up. I actually turned this base to make my card a landscape design. So I did go back in and add more of the navy after I took this photo. You can see in my finished photo that I did darken it up a bit.
Step 7: I cut my images in black to make them like a silhouette against the northern lights night time sky. The snow bank is a silver cardstock topped with chunky glitter for a glistening snow. My sentiment is stamped in Versamark ink and then I used a black embossing powder to make it bold and stand out. 
Step 8:  I am now ready to assemble my card. After it was put together, I decided to add some stars in the same colors I used for my ink. I cut the single stars from the Merry Christmas Ribbon die and scattered them across the sky.

If you want to look at a larger view of any of the pictures, just click on it and it will open up larger.
Well, that's my card for today. Hope your Sunday is a restful and relaxing one. So until next time.......God bless.
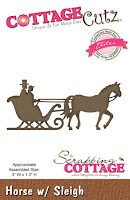
http://www.scrappingcottage.com/cottagecutzhorsewsleighelites.aspx

http://www.scrappingcottage.com/cottagecutzdeerandforestborder.aspx
I am also entering:
1.  Fashionable Stamping has a 'Tis the Season challenge- either Thanksgiving or Christmas.
2.  Alphabet Challenge is a "S" for stars.  
3.  Brown Sugar has an anything goes challenge.
 

Wednesday, November 9, 2016

Snowman in the Meadow

 
Hello Blogger Friends and thanks for taking the time to stop and visit with the Charmed Life Blog.
 
Well, it's the day after the Presidential election here in the US. It was a hard fought battle for the heart and soul of our nation. And, I am glad to know that all the negative ads attacking both candidates are over. As are most Americans, I believe.
 
Just because that's over doesn't mean we should turn it on each other. We need to show love, respect and humility. Today I am reminded of the biblical scripture that says we should pray for those in authority over us. Regardless of your political persuasion could it hurt us if we prayed for our new President? We need to return to civility in our land towards each other.
 
Anyway, let's move onto my card for today. This one I made for the color challenge #606 on Splitcoaststampers. Barbara was our hostess and she chose island indigo, bermuda bay and calypso coral.
I was determined to do a Christmas card with these colors. I had all kinds of ideas floating in my head and I decided to try the baby wipe technique. Duh- I didn’t have any of the reinkers in these colors. How could I not know that (lol)!!!
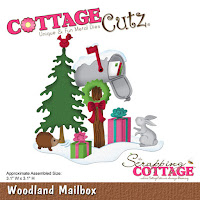
 So, I took a step back and used idea #2. I decided to make a little snowman scene. I used the CottageCutz “winter snowman” die and for my tree the CottageCutz “woodland mailbox” die. I dressed the snowman in a bermuda and coral scarf and his buttons and nose are cut in island indigo. I opted to leave my tree white and added a little chunky glitter on the branches.

My background was done with the MFT “falling snow” stencil and 3-D molding paste. Cut my snow bank with the Lawn Fawn stitched hillsides die and added some glitter.

My sentiment is from the PTI “in the meadow” stamp set. I stamped in island indigo ink and scattered a few bermuda bay sequins to complete my card.
 
Well that's it for me for today. So until next time.........God Bless.
http://www.scrappingcottage.com/cottagecutzwintersnowman.aspx
 
http://www.scrappingcottage.com/search.aspx?find=woodland+mailbox
 
I am also entering:
1.  A Snowflakes Promise has a season's challenge.
2.  613 Avenue Create has an anything goes challenge.
3.  Weekly Christmas Card challenge wants us to create a Christmas card.
  

Saturday, November 5, 2016

Nativity Ornament

Hello Blogger Friends! Thanks for taking the time to stop and visit with the Charmed Life Blog.
Well, it's the 1st Saturday in November and tonight we turn the clocks back an hour to end daylight savings time. Even though our weather has been so mild and it seems like summer wants to linger, the days are now officially getting shorter and winter is soon upon us. 
 
So tomorrow daylight will end around 5:30. But, I'm ok with it because that means my favorite time of year is just around the corner. Thanksgiving and then Christmas to follow will be coming sooner than we can blink an eye.
 
So if you haven't been thinking about your Christmas cards, I have one to show you today that would be easy to mass produce. You could use any stamped background or even leave the background plain for a more simpler card.

So let's get started with some details on how I created my card.
White Card Base: 4 1/4" x 5 1/2"
Midnight Muse Image Layer: 3 1/2"" x 5 1/2"
Silver side layers: 3/4" x 5 1/2"

My card for today is using the Fancy Nativity Ornament and the Believe with Holly flourish dies. As soon as I saw both these dies I knew I had to have them. It demonstrates in such a beautiful way the real reason we celebrate Christmas.

I started by cutting the ornament and believe word in a silver glimmer paper. I used the Sizzix Precision Base plate to cut the ornament because my Big Shot is older and sometimes needs a little help. You could also use some freezer paper if your machine needs a little assistance.  Both these dies cut so nicely and release from the die easily.
 
Next, I stamped my starry background. I like this Star of Light stamp set from Stampin'-Up. It helped me to create the explosion of stars that surround the ornament. That's how I imagine the heavens reacted on the night Jesus was born. I stamped with Versamark ink and then used a white embossing powder.
 
Once the background was finished, I added my ornament and the believe word. I like the contrast with the dark blue background and the silver glimmer paper.
 
Here are some close up shots of the Nativity Ornament and the Believe word. I cut 2 silver pieces of cardstock 3/4" x 5 1/2" to add to each side of the image panel. I wanted some definition here and also added card interest. By cutting the strips the way I did, it saves on your cardstock.

 
My final step was to add this image panel to the white card base. I also used foam mounting tape to lift the image panel away from the card base. Just another way to add character to your creation.
 
Well, that's it for me for this post. So until next time.......God bless.
 
http://www.scrappingcottage.com/cottagecutzbelievewhollyflourish.aspx

http://www.scrappingcottage.com/search.aspx?find=fancy+nativity+ornament
 

LinkWithin

Related Posts with Thumbnails